
First look into Daytona-Typescript integration
I used Daytona for my relay-chat-backend, a WebSocket chat application written in Typescript/NodeJS setup.
Introduction
Daytona is a powerful and extremely user-friendly open source development environment manager. It's particularly useful for building a standardized development workflow, ensuring that environments stay consistent and predictable across the development lifecycle.

How Daytona Helped Me
When I started contributing seriously to open source this year, especially during Hacktoberfest'24, I noticed a huge amount of time and resources were wasted during project setup. To contribute, I'd first fork the repo, clone it, open in VSCode, install dependencies, and finally get it running locally. This repetitive process was tedious and time-consuming.
I kept wondering if there could be an easier, faster way to start contributing…
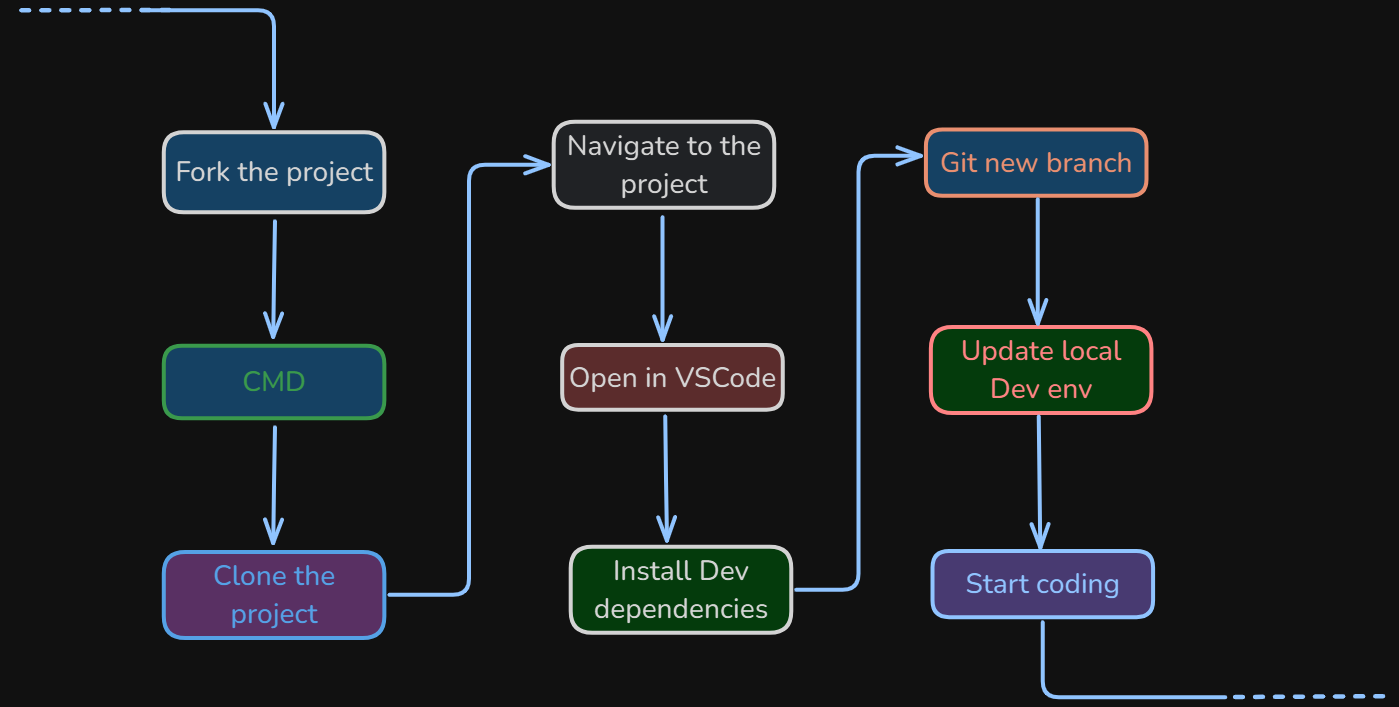
Enter Daytona: A tool that lets you skip the tedium and get straight to coding, without hassling over environment setup.
I used Daytona for my relay-chat-backend (a WebSocket chat app in Typescript/NodeJS). The experience was impressively smooth: every step—from environment creation to running the app—worked perfectly.
Why You should also use Daytona:
Advantages
The highlight for me is the cool & interactive CLI. With just a command, you can spin up a complete dev environment!
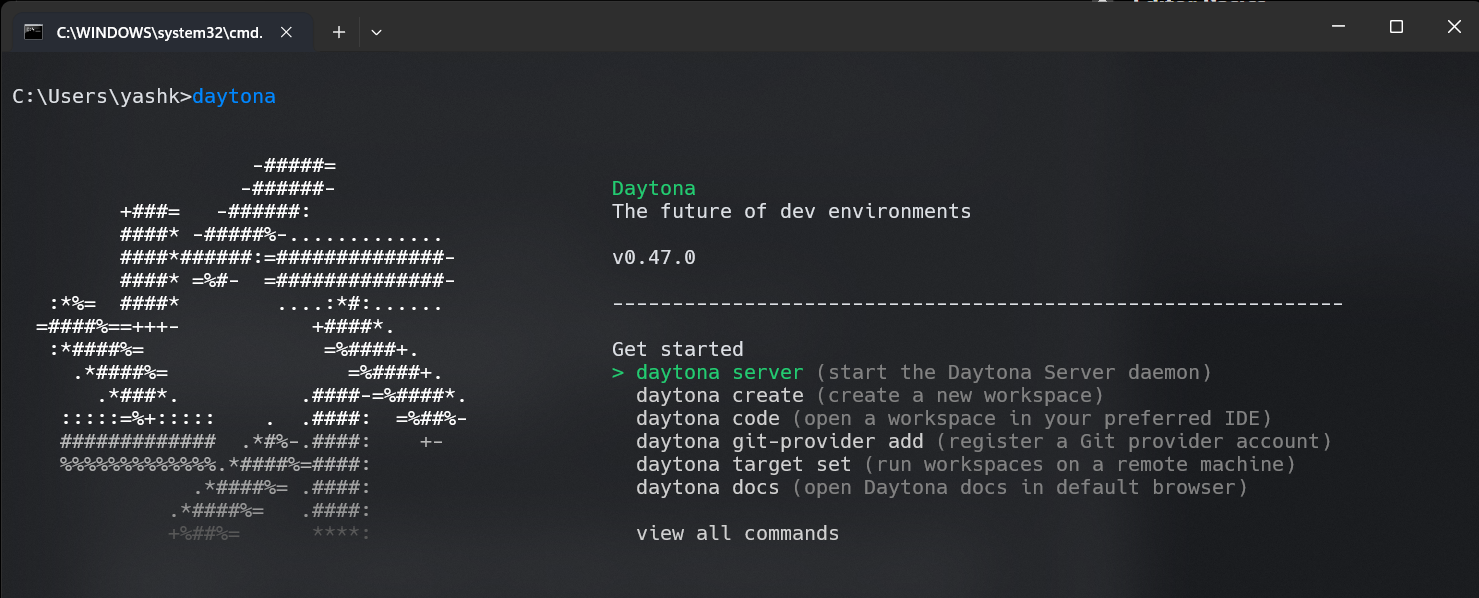
Create the whole environment with:
daytona create <REPO URL>
Getting Started
- Install Daytona — Follow their Official Installation Guide
-
Windows Install: Install Daytona with this PowerShell script:
$architecture = if ($env:PROCESSOR_ARCHITECTURE -eq "AMD64") { "amd64" } else { "arm64" } md -Force "$Env:APPDATA\bin\daytona"; [System.Net.ServicePointManager]::SecurityProtocol = [System.Net.SecurityProtocolType]'Tls,Tls11,Tls12'; Invoke-WebRequest -URI "https://download.daytona.io/daytona/v0.47/daytona-windows-$architecture.exe" -OutFile "$Env:APPDATA\bin\daytona\daytona.exe"; $env:Path += ";" + $Env:APPDATA + "\bin\daytona"; [Environment]::SetEnvironmentVariable("Path", $env:Path, [System.EnvironmentVariableTarget]::User); daytona serve; -
Add Git Providers:
Daytona makes it easy to connect to your favorite Git platforms.
daytona git-providers add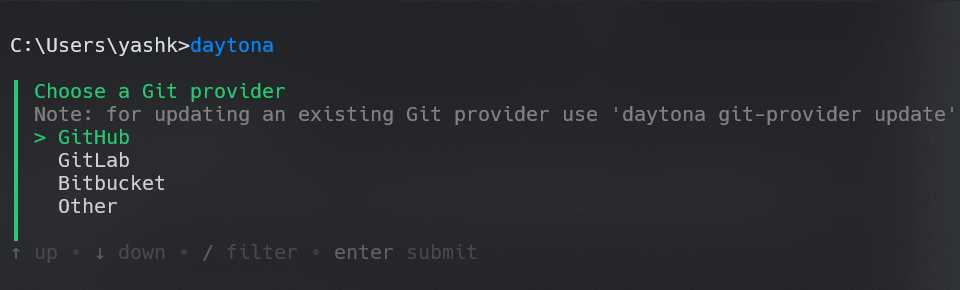
NOTE: Multiple other git providers are also supported.

-
Setup Cloud Providers:
Easily create and manage environments with providers like Azure, AWS, GCP, localhost, Docker (local or remote).
NOTE: For extra options, install the provider SDK first.
daytona provider install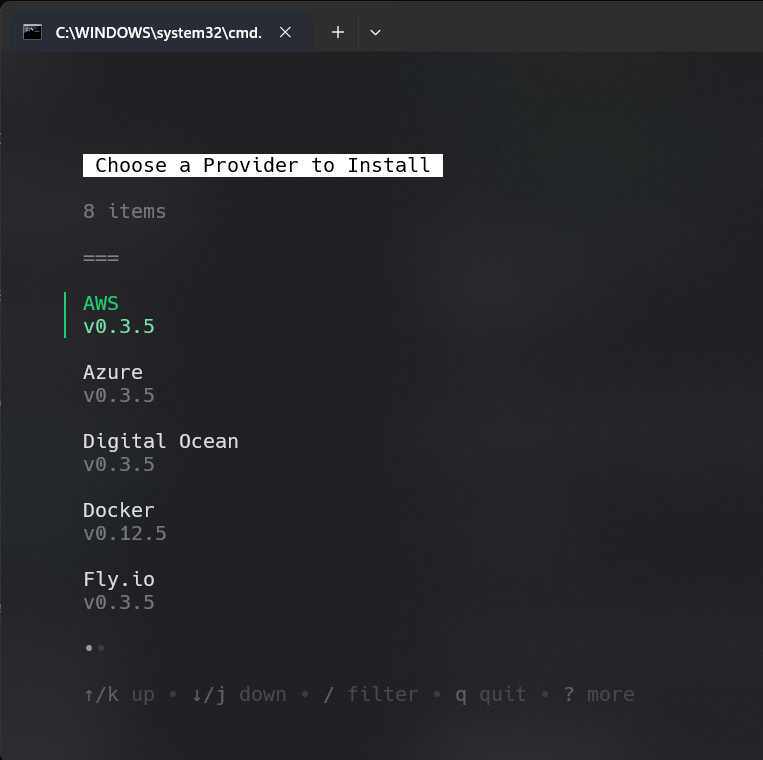
-
Add a Dev Container:
When ready, add
.devcontainer/devcontainer.jsonto your project. If setup feels tricky, just use Devcontainer AI – copy-paste your repo link, and let it generatedevcontainer.jsonautomatically.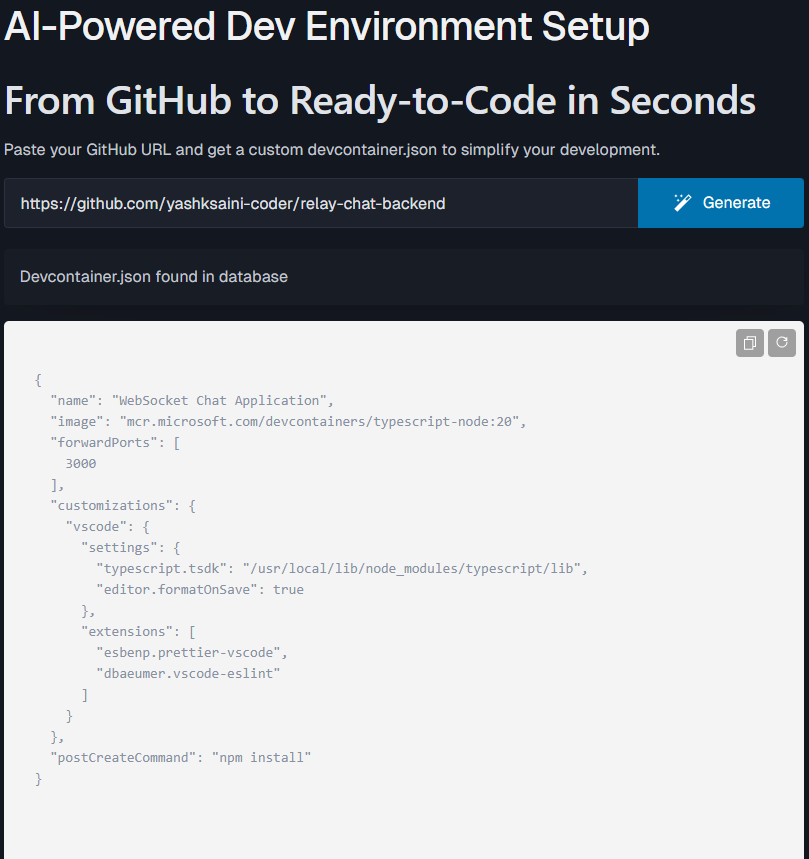
Here’s my relay-chat-backend devcontainer.json config file:
{ "name": "WebSocket Chat Application", "image": "mcr.microsoft.com/devcontainers/typescript-node:20", "forwardPorts": [ 3000 ], "customizations": { "vscode": { "settings": { "typescript.tsdk": "/usr/local/lib/node_modules/typescript/lib", "editor.formatOnSave": true }, "extensions": [ "esbenp.prettier-vscode", "dbaeumer.vscode-eslint" ] } }, "postCreateCommand": "npm install" } -
Create your project workspace:
daytona create https://github.com/yashksaini-coder/relay-chat-backend -
Final Step:
To start the application, simply run:
npm run dev
Key Takeaways
- Productivity Boost: Automates tedious initial setup and environment management, streamlining and optimizing my entire workflow.
- Security: Offers controlled access and robust dependency management, keeping your projects and sensitive info secure.
- Scalability: Easily handles modifications and scaling (tried on a full stack chat app—both frontend & backend—worked like a charm!).
Conclusion
I loved using Daytona! It's easy, quick, highly portable, and makes dev environment management a breeze. Try it today – you'll have a great experience, I promise.
If you liked this blog, please support my projects:
- Relay-chat-backend Repository
- Star Daytona on GitHub